RUMI Hat: Dragon Braid
Originally written on 31 Aug 2025. Revised and updated 27 Sep 2025.
I thought a lot about how to do Rumi’s braid and looked at lots of pictures online. We are sticklers for accuracy in this house so I knew it had to look perfect.
I considered making it out of some kind of foam and crocheting around it, but I’ll be honest: That sounds like a LOT of tedious work. Maybe it would be easier with some kind of knitting machine, but I don’t have one. Also, the yarn looking like hair is the look I’m going for. Crocheted tubes just isn’t the same.
I put a lot of effort into figuring this out and I am offering it up here for free. If you are going to make this and sell it, please don’t be an a**hole - credit me with the design.
MAKING THE BRAID
I only used a partial skein of Big Twist Lilac yarn to make the hat, so I used the rest of that skein for the braid.
To cut the yarn for the braid, I actually wrapped it around a couple of my dining chairs so I had a big continuous loop and then tied it and one end and cut it at the opposite end so I had a thick fistful of long pieces doubled over in half. The tie in the middle naturally divides the “hair” into 2 sections, which works well for this type of braid.
From the top where the bundle is tied to the ends at the bottom, it was about 40 inches long, meaning each strand is 80 inches long and folded over in the middle. I’m not saying you can’t make a longer braid (on my first try I actually made the strands 55/110 inches long), but the longer it is, the heavier it will be and the heavier it is, the more likely the braid is to just pull the hat right off the head when it moves.
EDITED TO ADD: I counted about 110 total 80-inch strands on the most recent dragon braid that I made. I think anywhere from 105-130 is a good amount for a thick, Rumi-esque braid.
In studying Rumi’s braid, I noticed that it seems to be a dragon braid made with 4 strands. I watched this video on YouTube from EverydayHairInspiration to refresh my memory on how to do a dragon braid.
You’ll notice that in the video she uses little hair ties all along the braid and I tried doing it without that, but the braid was not very sturdy. What I ended up doing (because putting those tiny hair ties on this giant braid was not in the cards) was ordering some purple zip ties and using those in place of the hair ties, which resulted in a much sturdier dragon braid. I used a large hair clip to hold the strands I wasn’t working with while I put the zip ties on.
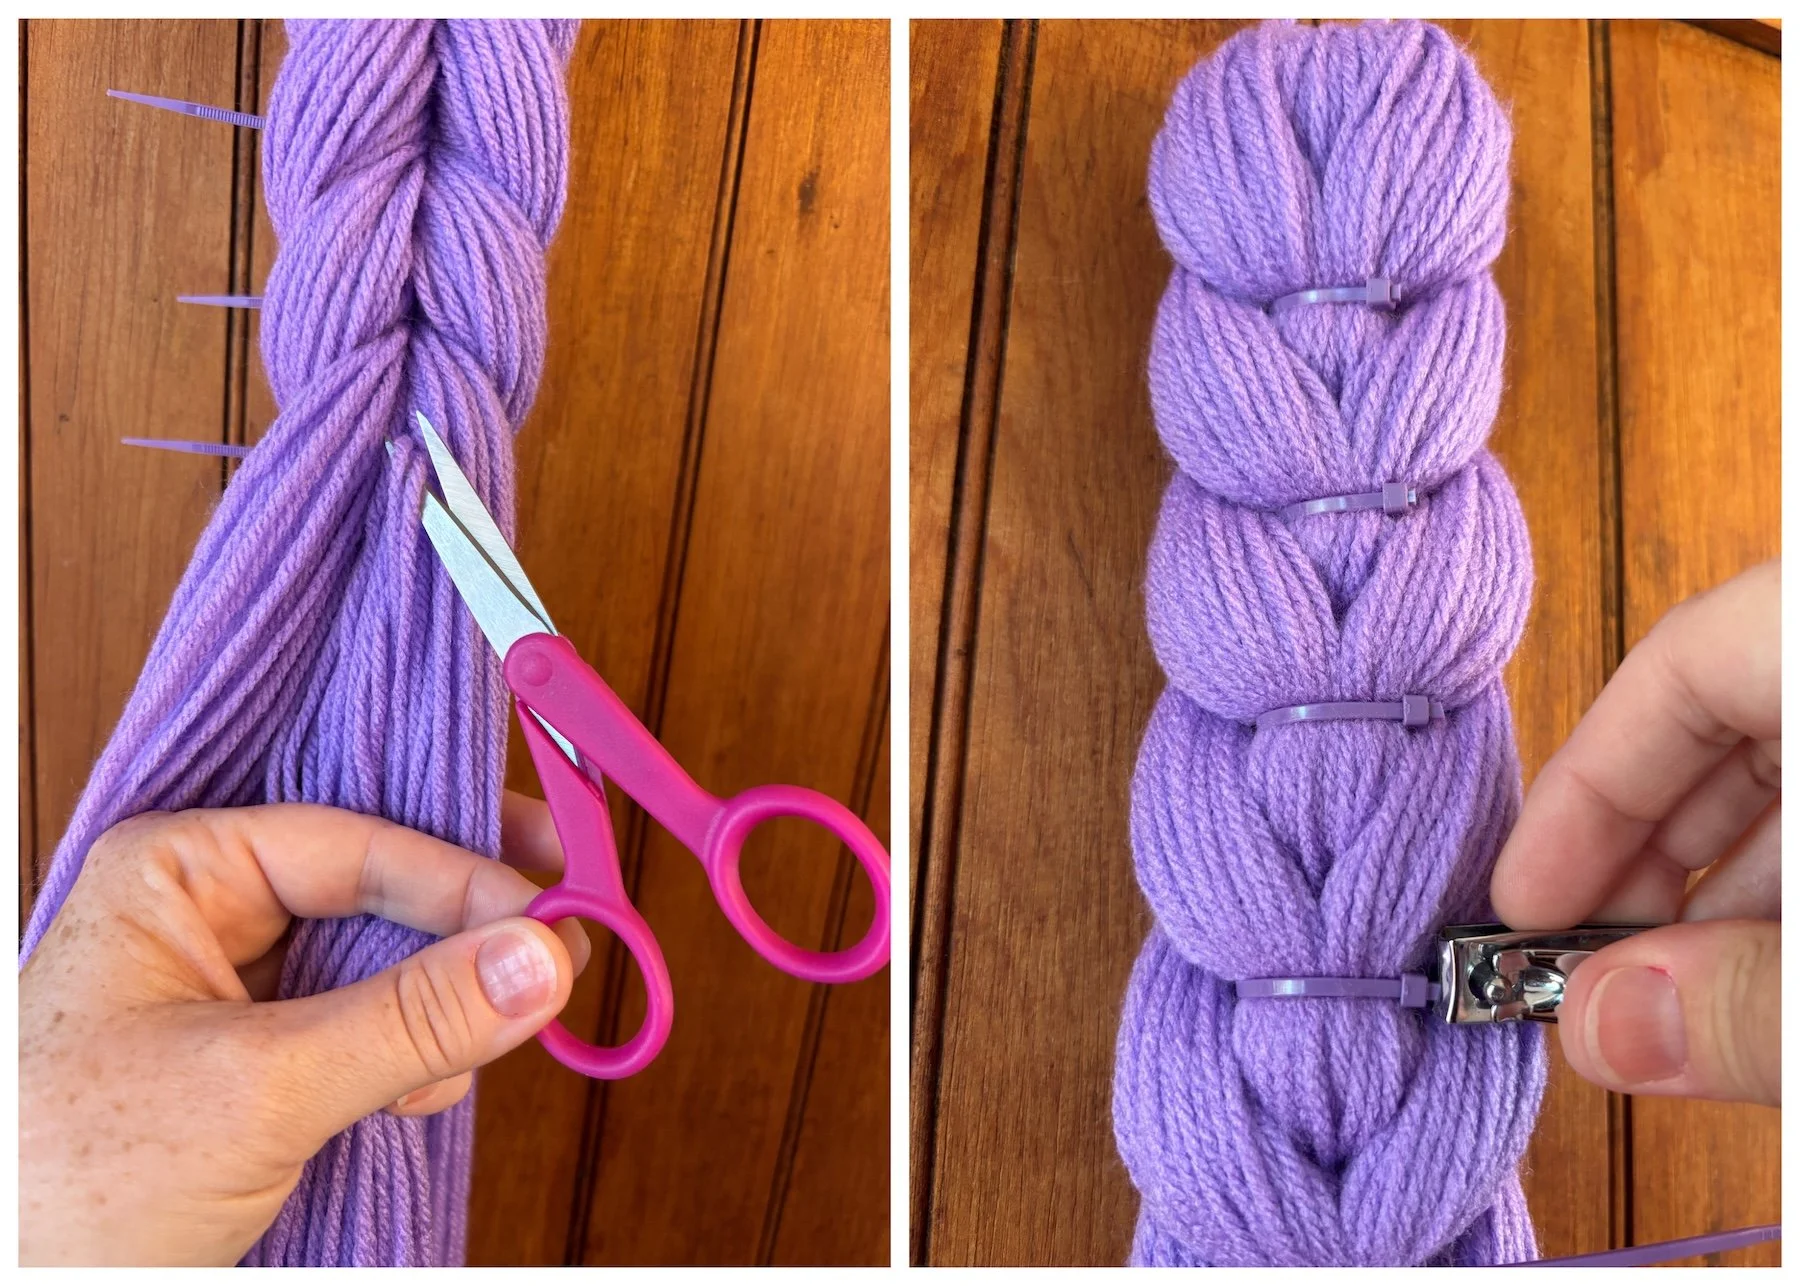
After about 8 “wraps” of the braid (in other words after about 8 zip ties have been attached), I started snipping out 2 strands from each side to slowly make the braid smaller and lighter. I tried to cut these strands from the middle of the bundle of hair so that they wouldn’t show.
UPDATE: I only used this method of snipping out strands from the middle on a few hats before deciding that it was not worth the trouble. I’ve left the description of it here in case you’d like to do it, but I don’t find it to be essential for the hat/braid to work.
When I was done (about 24-26 zip ties later), I snipped the long tails off the zip ties with a fingernail clipper so that I wouldn’t accidentally also cut some of the yarn.
ATTACHING THE BRAID
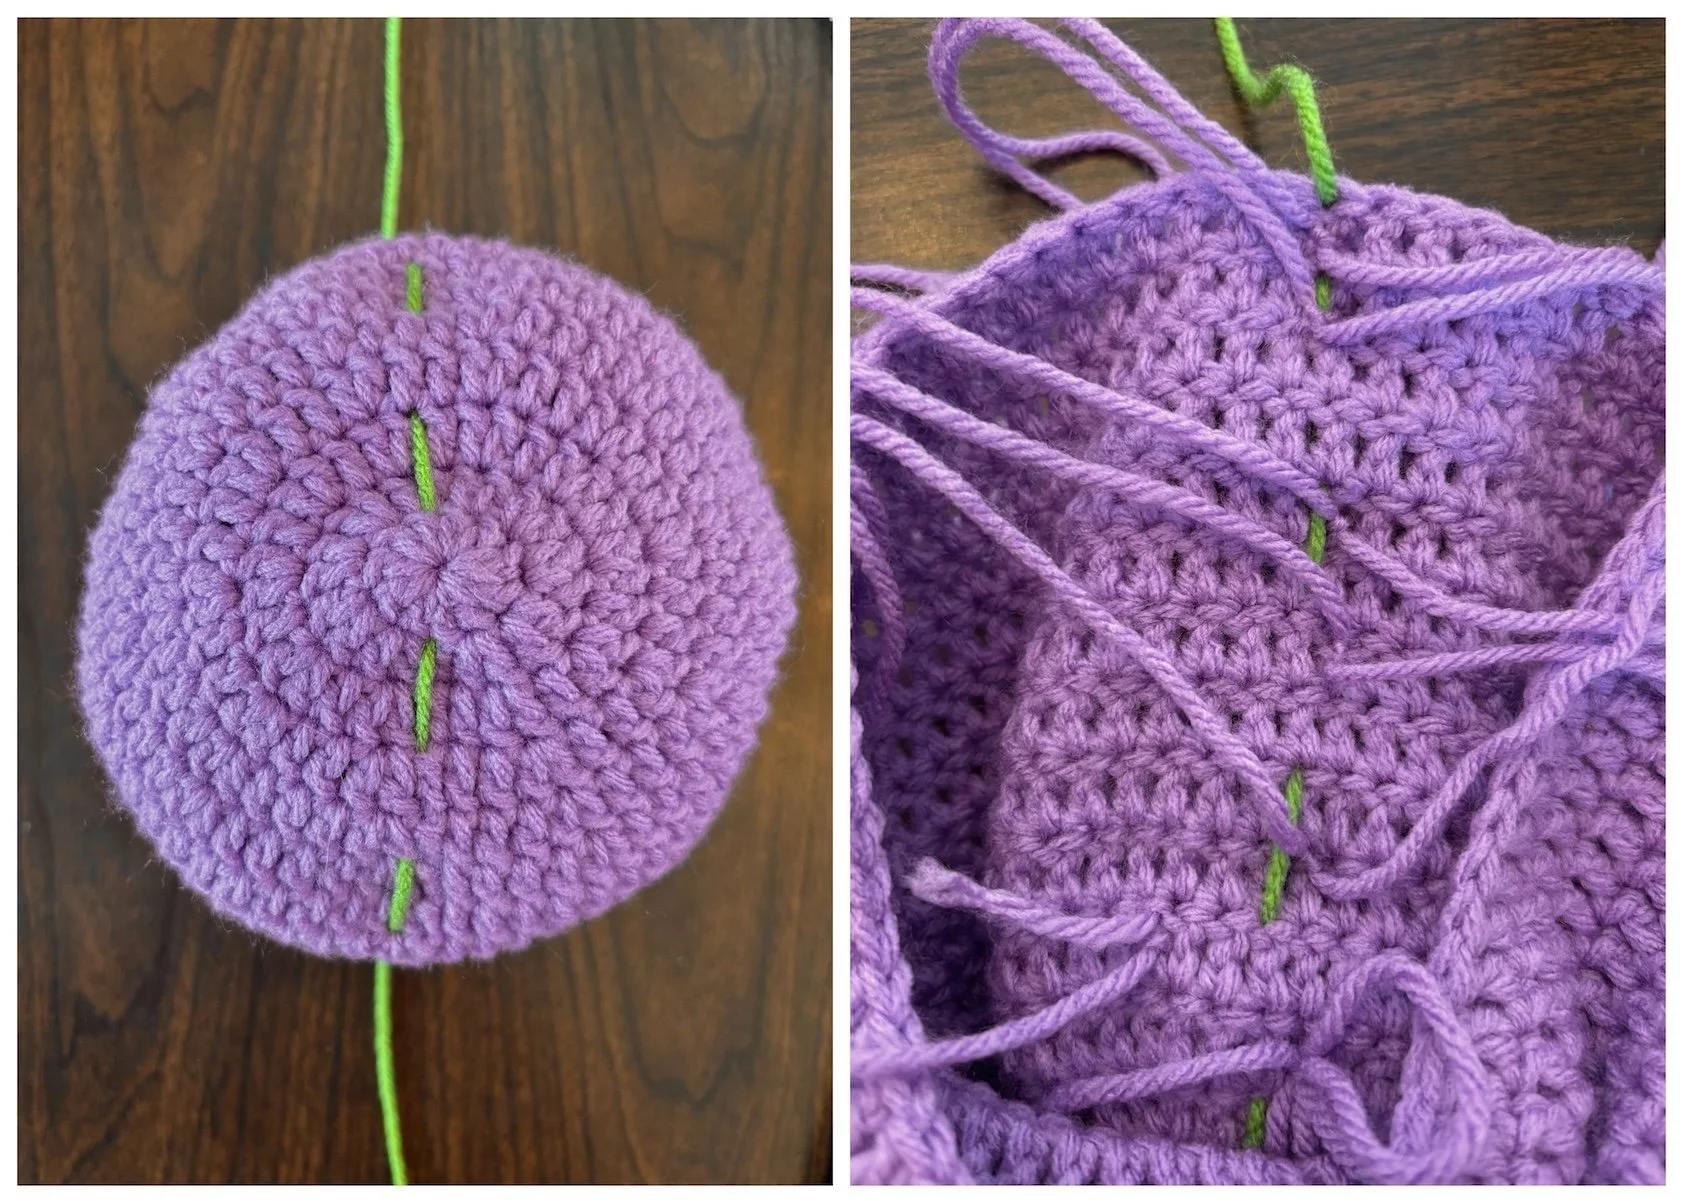
In order to get the braid as close to “centered” on the hat as I could, I used a piece of contrasting yarn (Red Heart Spring Green if you must know) and wove it in a straight-ish line from the spot in the back where I joined the last row to the top and then down to the front. This gave me a rough guide for where to attach the braid.
I used several of the leftover yarn pieces I snipped out of the braid and a yarn needle to stitch the braid to the hat, starting at the front first and then the top.
I found the easiest way for me to do this was to use the yarn needle to poke one end of the leftover yarn piece through the braid and into the hat right next to one of the zip ties on the braid, then take the needle off the yarn and and put it on the other end of the leftover piece and poke it through on the other side of the zip tie. Once both ends were on the inside of the hat, I knotted them together tightly. You could probably just knot them tight and snip the ends short, but I wove them in.
Once the braid is attached at the front and the top, I continued attaching it at each zip tie until it was attached at the first 8 or so zip ties. You could attach it all the way down to the bottom of the back, but if you know Rumi, you know her braid flies out behind her when she’s running so it doesn’t really make sense for the braid to be attached all the way down.
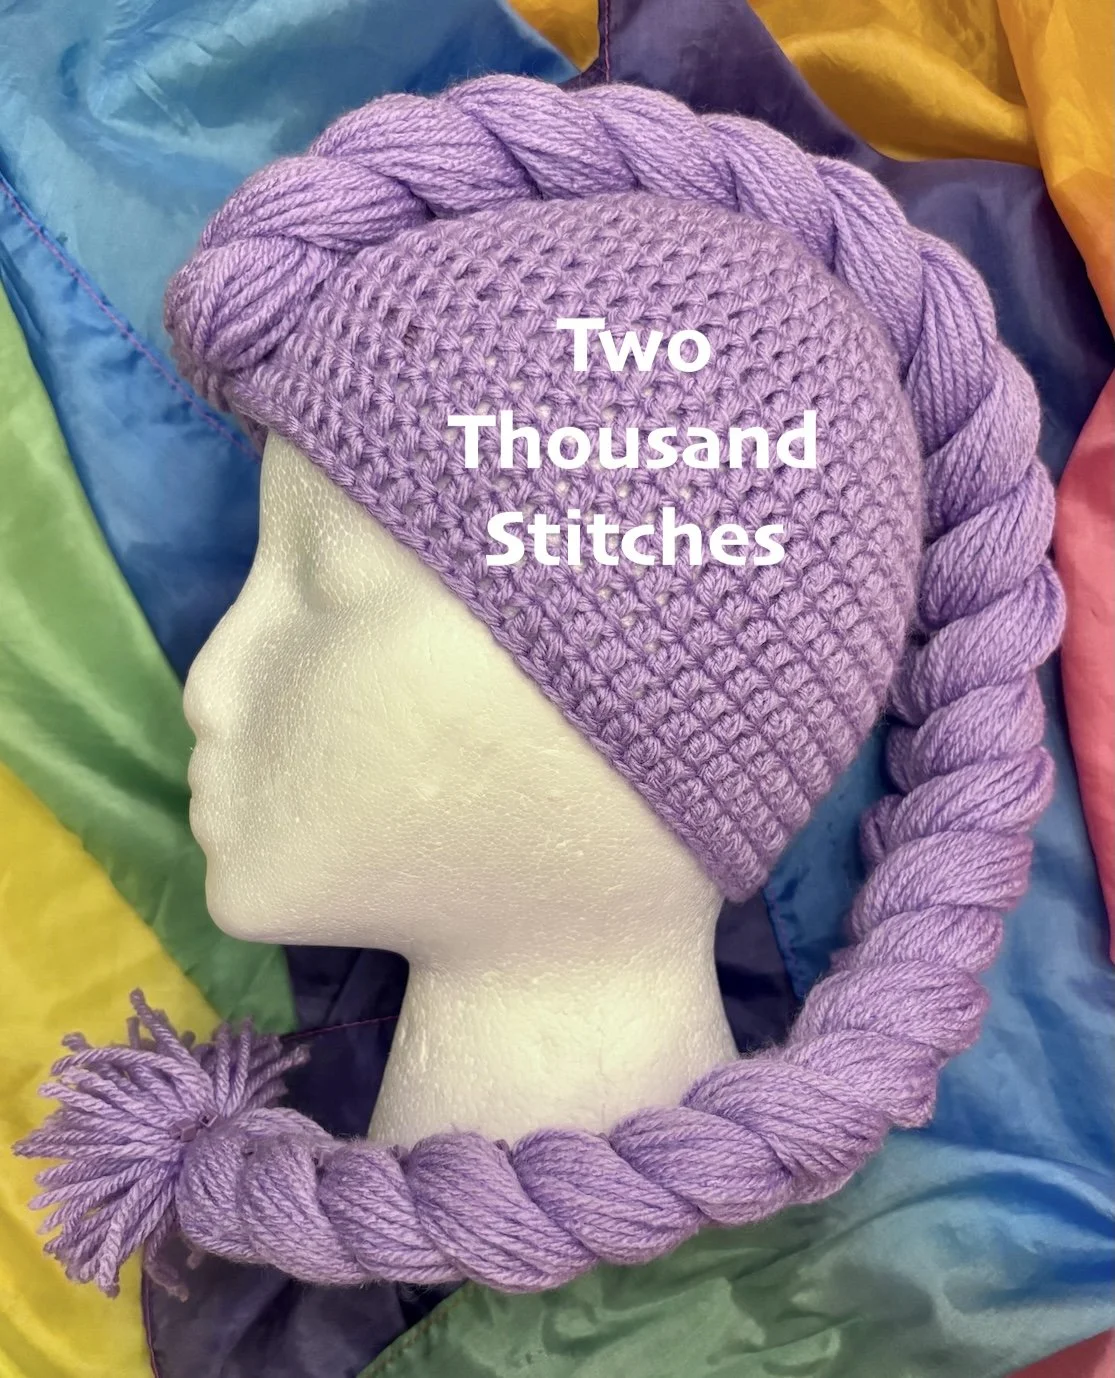
I trimmed the end of the first one (pictured above) a bit shorter than I meant to, but do what looks right to your eye.
That’s it! I hope this has been helpful. I’d love to see pictures of your Rumi hat! Some of this was a bit tricky to explain, so feel free to ask questions. You can send me a message through my website Contact Form.